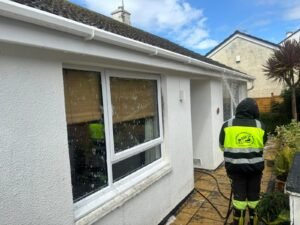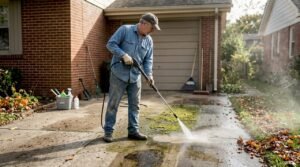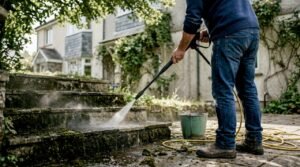
Pressure washing can entirely reshape the appearance of your home, giving it a fresh and inviting look. Imagine transforming dirt-covered surfaces into pristine areas with just a few hours of work. With the right information and tools, you can tackle this project yourself, saving both time and money. This guide provides ten practical tips to help you achieve remarkable results.
Understanding Pressure Washing Basics
Before jumping into the tips, let’s cover the basics. Pressure washing uses a high-pressure water spray to remove dirt, mould, grime, and other stubborn debris from surfaces such as driveways, patios, and siding. Knowing how to safely and effectively operate a pressure washer is essential for avoiding damage and achieving the best results. Understanding the machine will enhance your overall experience, making it not only easier but also more enjoyable.
A little knowledge goes a long way in ensuring your pressure washing journey is smooth!
1. Choose the Right Pressure Washer
Selecting the Best Type for Your Needs
Selecting the right pressure washer is vital for effective cleaning tasks. There are two main types to consider: electric and gas-powered.
- Electric Pressure Washers: These are lightweight and quieter, making them perfect for small to medium jobs like washing cars or cleaning patios and garden furniture. For example, models like the Sun Joe SPX3000 provide up to 2030 PSI, which is sufficient for most household tasks.
- Petrol Pressure Washers: More powerful, these are ideal for extensive jobs, such as blasting away grime from driveways or cleaning siding. The Simpson Cleaning MSH3125-S offers a strong 3200 PSI, making it suitable for heavy-duty cleaning. However, it requires more maintenance than an electric model.
Choosing the right machine lets you work efficiently based on your cleaning needs!
2. Know Your Surface Material
Understanding the Capabilities of Your Pressure Washer
Different surfaces react differently to pressure washing. Here is a quick guide to help you navigate:
- Concrete: Strong and durable, it can handle high pressure, making it an excellent candidate for deep cleaning.
- Brick: Use a lower pressure to prevent chipping the mortar or damaging the brick surface.
- Wood: Exercise caution; excessive pressure can harm the wood fibres, leading to splintering.
- Vinyl Siding: Generally safe at medium settings, but ensure the nozzle remains at least six inches away for best results.
Knowing your materials can save you from costly damage and ensure your project goes smoothly!
3. Pre-Treat Stains for Better Results
Getting a Head Start on Tough Stains
Before you start pressure washing, identifying and pre-treating stubborn stains can make a big difference. For tough spots, consider these options:
- Mildew and Mould: Mix bleach with water (one part bleach to three parts water), or use a commercial cleaner designed for mildew. Let it sit for about 10 minutes for better results.
- Oil and Grease: Spray a degreaser, allowing it to dwell for 15-20 minutes before washing it away. This step can improve effectiveness, especially on driveways where oil stains are common.
Pre-treating significantly enhances your cleaning power, leading to a happier, cleaner finish!
4. Use the Correct Nozzle
Understanding Nozzle Types for Optimal Cleaning
Using the right nozzle is integral to effective cleaning. Here’s a breakdown of common pressure washer nozzles:
- 0-Degree: This nozzle produces a high-pressure stream; use it sparingly for stubborn stains.
- 15-Degree: Excellent for stripping paint or cleaning tougher stains with adequate pressure.
- 25-Degree: This is a versatile option suitable for general cleaning on most surfaces.
- 40-Degree: Creates a gentle spray, perfect for delicate surfaces like wood or siding.
Using the correct nozzle not only maximizes cleaning results but also minimizes the risk of damage!
5. Keep a Safe Distance
Maintaining the Right Nozzle Distance
Maintaining the correct distance between the nozzle and the surface is crucial for effective cleaning without damage. Here are safe distance guidelines:
- For concrete surfaces, keep about 12 inches away.
- For wood and siding, aim for 18 to 24 inches.
If you are unsure, start farther away and gradually move closer. This approach helps avoid unintentional damage to surfaces.
6. Use Proper Technique
Mastering the Art of Pressure Washing
The technique you use can significantly impact your pressure washing experience. Here are practical techniques to implement:
- Start from the Top Down: Always wash from the highest point of the surface. This prevents dirty water from running onto already clean areas.
- Overlap Your Strokes: Similar to painting, slightly overlap each stroke for complete coverage.
- Keep the Nozzle Moving: Avoid focusing on one spot for too long, as this could damage the surface. Maintain a steady motion for the best results.
Perfecting your technique makes the job easier and more rewarding!
7. Wear Appropriate Safety Gear
Protecting Yourself During the Process
Safety is paramount when pressure washing. Make sure to equip yourself with essential safety gear:
- Safety Goggles: Protect your eyes from flying debris and chemical splashes.
- Non-Slip Shoes: Use shoes with good grip to ensure stability on wet surfaces.
- Gloves: Wear gloves to keep your hands safe from harsh chemicals and grime.
Investing in quality safety equipment helps you focus on your work without worrying about potential accidents!
8. Don’t Forget About the Detergent
The Power of Soaps and Detergents
Using the right detergent can greatly enhance your cleaning results. Here’s how to do it effectively:
- Choose the Right Detergent: Select a cleaner formulated for your specific cleaning task. For instance, mould removers are ideal for damp areas.
- Application: Apply the detergent before you pressure wash and let it sit for about 5-10 minutes. Do not let it dry, as this can cause damage.
Detergents can help break down tough stains, making your job easier!
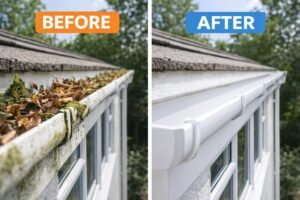
9. Rinse Thoroughly
The Importance of a Proper Rinse
After cleaning surfaces, rinsing is vital to remove any detergent residues. Follow these steps:
- Use clean water at pressure to rinse away all soap.
- Rinse from the top down to avoid streaks and ensure even coverage.
- Focus on corners and edges, areas where debris tends to accumulate.
Thorough rinsing guarantees your clean surfaces stay shiny and free from residue!
10. Follow Up with Routine Maintenance
Keeping Your Home Looking Its Best
Once you’ve completed your pressure washing, maintaining your spaces is essential. Here are some easy routine tips:
- Regularly inspect areas susceptible to mould and mildew and treat issues quickly.
- Plan for pressure washing every 1-2 years, adjusting to your local climate conditions.
- Create a cleaning schedule for outdoor spaces to keep dirt and grime from building up.
Engaging in regular maintenance will help you retain that fresh, clean look you’ve worked hard to achieve!
Is DIY Pressure Washing Worth It?
Definitely! With the right tools and knowledge, DIY pressure washing saves you money and gives a satisfying sense of achievement. Witnessing the transformation of your home can be incredibly rewarding.
Equipped with these ten practical tips, you can now take on your pressure washing projects with confidence. Enjoy your revitalized, clean spaces that will surely impress your neighbors! If you ever want to bring in a professional touch, consider local pressure washing services that can assist in maintaining those pristine surfaces.
Happy cleaning!